
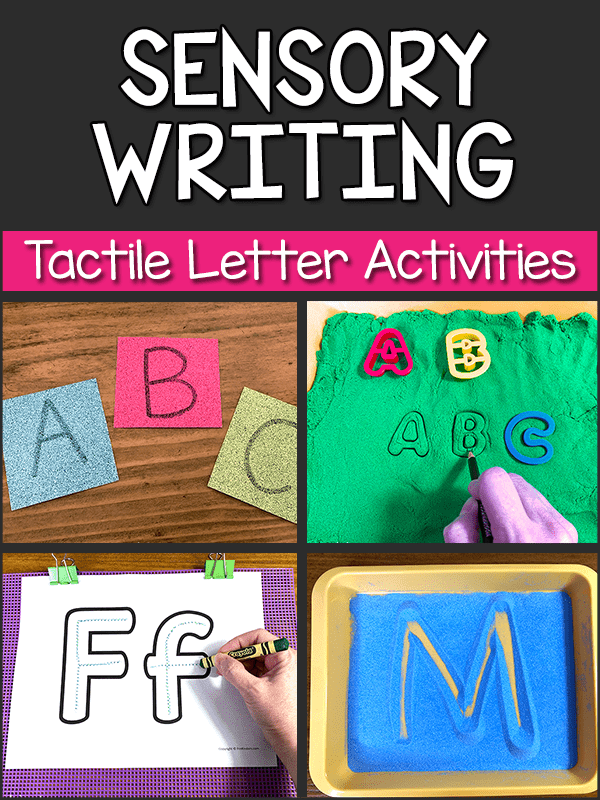
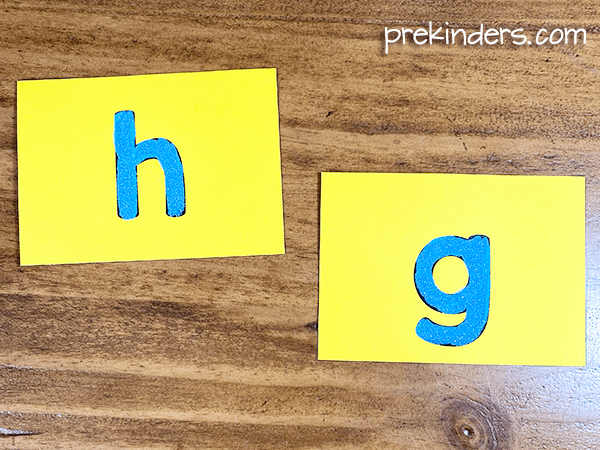
Sensory writing trays and tactile letters help children learn to write letters using a multi-sensory approach (or learning through the senses). Research shows that learning through the senses helps the brain process information. When using tactile letter activities, children can feel the letters as they trace them.
Some children learn better with sensory writing trays rather than with paper and pencil because they need to move and touch as they learn. If using a pencil or stylus with these activities, children can practice pencil control without the worry or stress of making mistakes.
These sensory writing trays and tactile writing activities help children with handwriting, letter formation, and pre-writing skills.
When using tactile activities, be sure to show children how to use correct stroke sequence, going top to bottom. To help with this, you can place letter cards with direction arrows beside the activity. Make sure children use correct tripod pencil grasp.
These sensory writing trays can be used to form letters, numbers, shapes, and pre-writing lines.
This post contains some affiliate links.
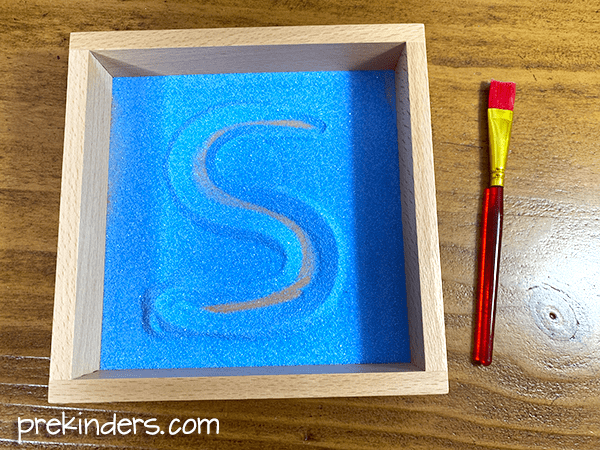
Sand Tray: Sensory Writing Trays
Add a little colored sand to a tray and have children write letters with a wooden stylus, paintbrush, or their finger.
Put just enough sand in the tray to cover the bottom, but not too deep. I prefer to use colored sand rather than salt because salt hurts if children have a small cut on their finger.
There are lots of options for sand trays. You can use any plastic or wooden tray with a flat bottom for a sensory writing tray. You can use a sandwich box. This sand tray in the picture below is a Montessori Sand Tray from Amazon.
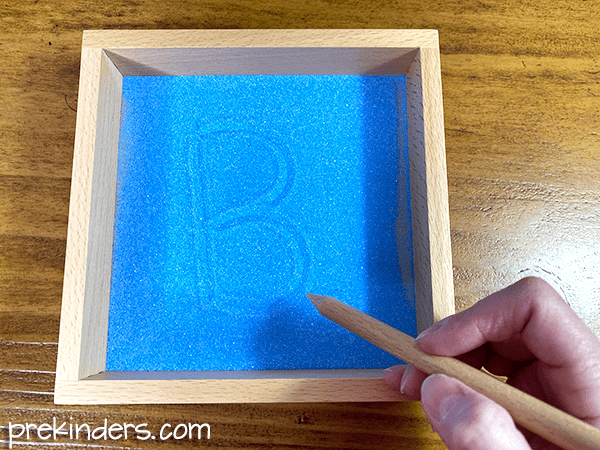
You can use a small paintbrush to write the letter in the sand. (My short paintbrushes came from Hobby Lobby in a pack of 8.)
Children can use their finger to write in the sand.

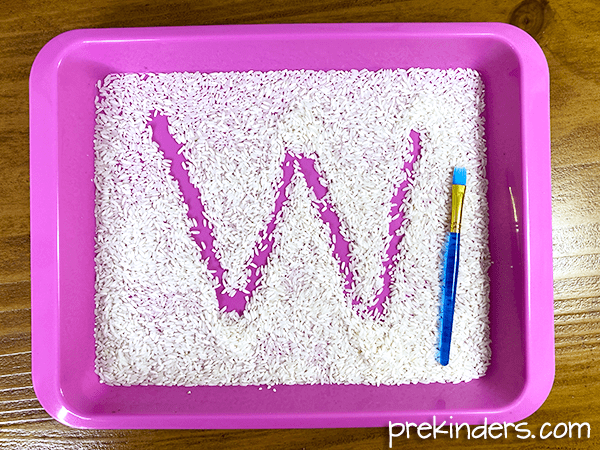
Rice Tray: Sensory Writing Trays
Pour some plain uncooked rice in a plastic tray for this sensory writing tray. You can color the rice if you choose, but white rice looks nice in a colorful tray. These colorful activity trays are from Amazon and they are perfect for so many projects.
Be sure to put just enough rice to cover the bottom, but no more. It works best if there’s not too much rice. Children can write the letter with their finger.
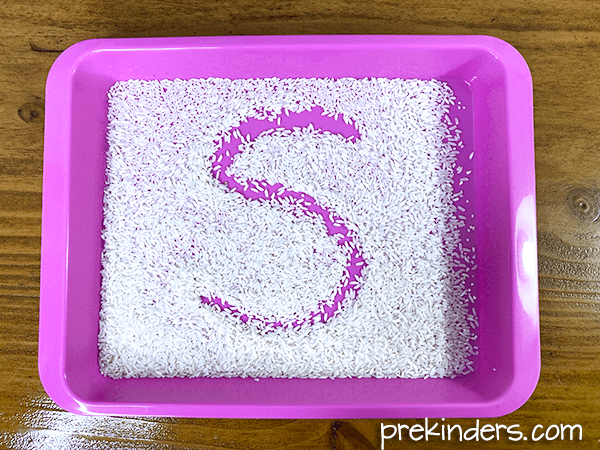
Children can also write the letter with a small paintbrush. I recommend using short paintbrushes since short pencils are recommended by occupational therapists for children learning to write.
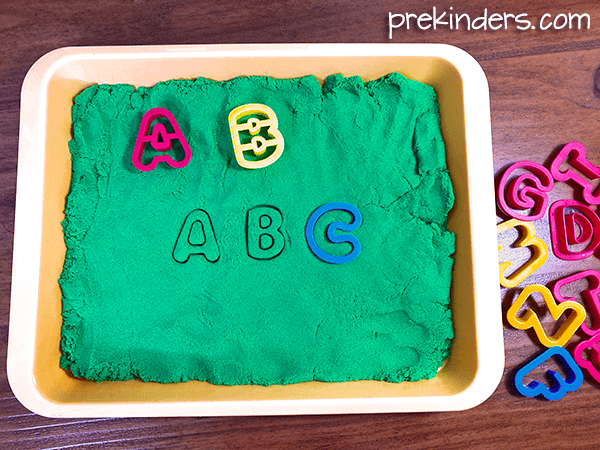
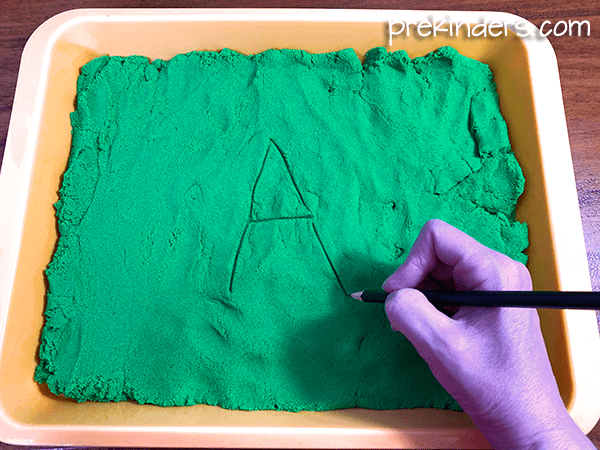
Kinetic Sand: Sensory Writing Trays
For this sensory writing tray, put kinetic sand in a plastic tray and have children press alphabet cookie cutters in the sand. Children can then use their finger to trace the letter in the sand.
You can also have children use a pencil to trace the letters.
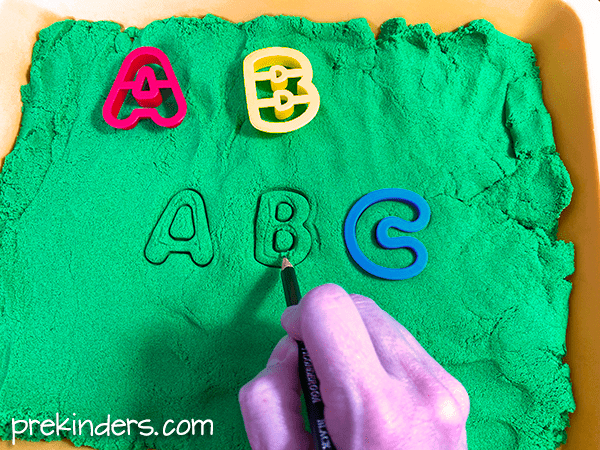
Another option is to have children draw the letter into the sand with a pencil and have them trace over it with their finger. Or, for beginners, and adult can draw the letter and the child can trace over it with their finger.
A 2-pound bag of kinetic sand filled this tray perfectly.
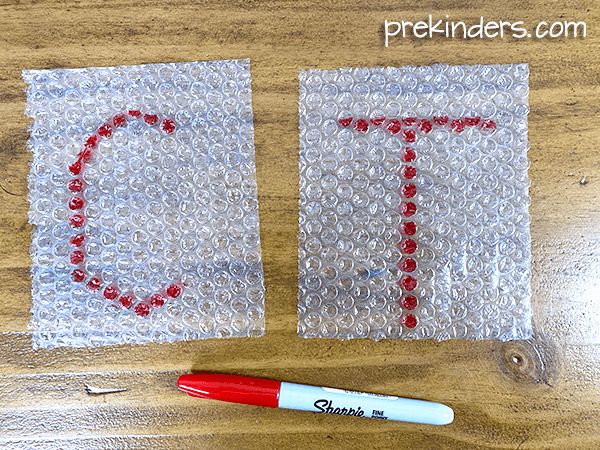
Bubble Wrap Letters: Tactile Letters
Cut pieces of bubble wrap and write the letters on each piece using a permanent marker. Then go back over each letter, making sure the bubbles are colored well enough to see them. Just recycle some bubble wrap from packages you receive (ask parents to save it too!)
Children will trace over the bubble wrap letters with their finger.
DIY Sandpaper Letters: Tactile Letters
Sandpaper letters can be purchased, but they are usually expensive. Here’s a way to make your own. Print out letters on card stock paper (you can use colored or white paper). I used the alphabet printable letters on this page. Paint over the letters with school glue using a paintbrush. While the glue is still wet, sprinkle colored sand over the letter, then set it aside to dry.
Children can trace over the sand paper letter with their finger.
Another option is to use a die cut machine and cut the letters out of sandpaper.
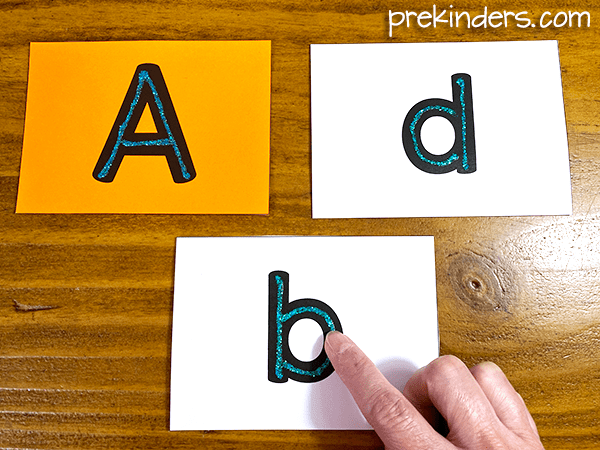
Glitter Glue Letters: Tactile Letters
Glitter glue letters are similar to sandpaper letters. Just print the letters on card stock and use glitter glue to trace the letters. I used the alphabet printable letters on this page. Children trace over the glitter letters with their finger.
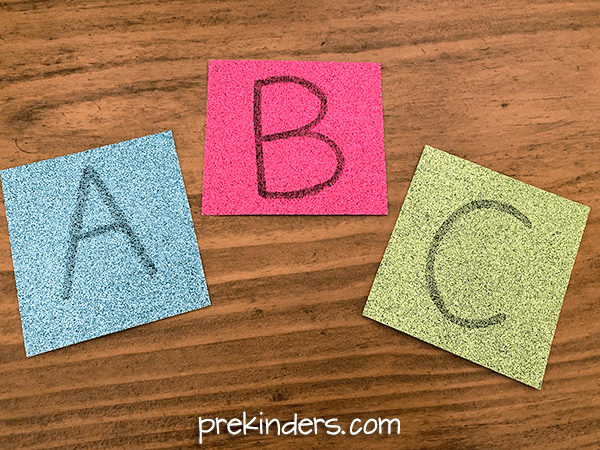
Glitter Paper Letters: Tactile Letters
This is a very easy way to make glitter letters. Get glitter card stock paper from a craft store (they have it in lots of pretty colors). Then simply write the letters on the glitter paper using a thick bold permanent marker. Children trace over the glitter paper letters with their finger.
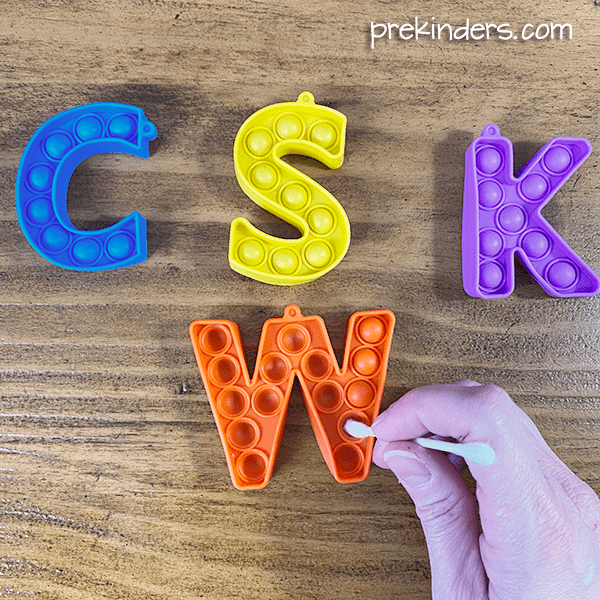
Pop Its Alphabet
I found these Pop It Alphabet letters on Amazon and thought they would make perfect (and fun!) tactile letters. These are small and just perfect for little fingers.
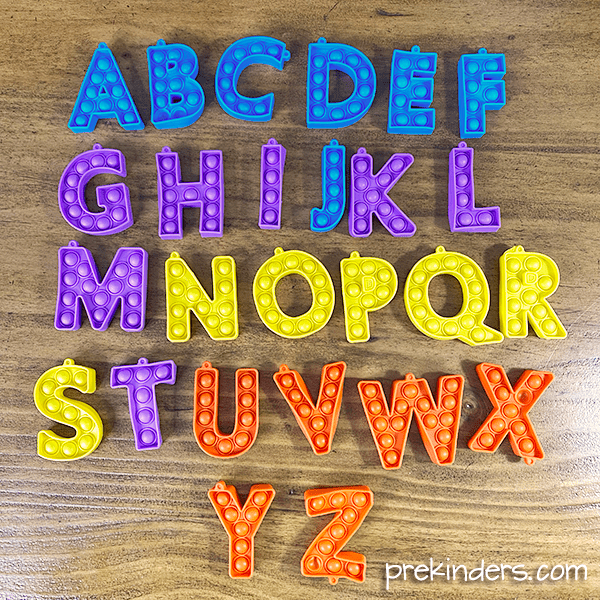
Children can first pop all of the bubbles on the pop-it letter, then trace over the letter with their finger.
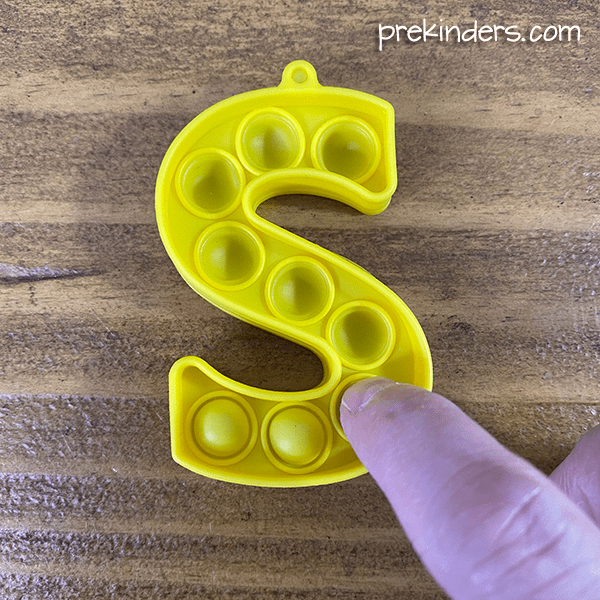
These are also just the right size to use a Q-tip to punch the popit letters. Grasping the Q-tip is great for fine motor practice.
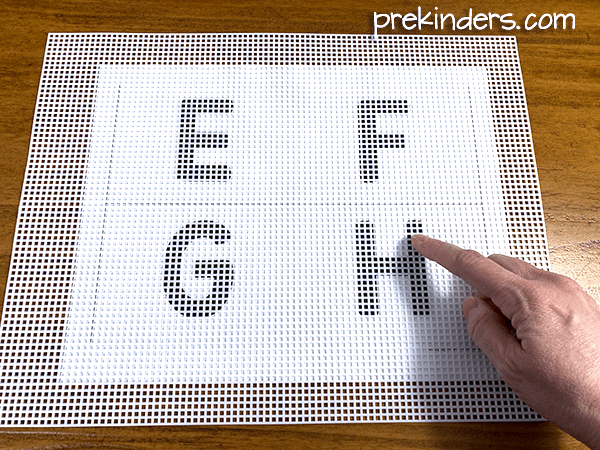
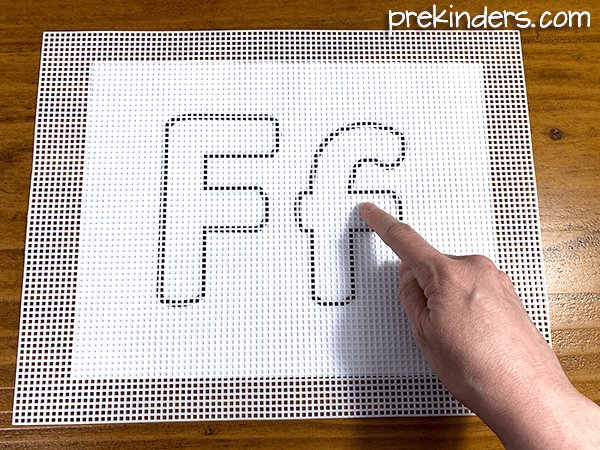
Plastic Canvas Letters: Tactile Letters
Plastic canvas letters are easy and quick to prep! Just print out some letters, lay a piece of plastic canvas over the paper and have children trace over it with their finger.
Plastic canvas is inexpensive (less than $1) and found in craft stores. I recommend using the white or clear plastic canvas to lay on top of the letters and using letters that are bold black, printed on white paper. This way the letters are more visible through the canvas. I used the alphabet printable letters on this page.
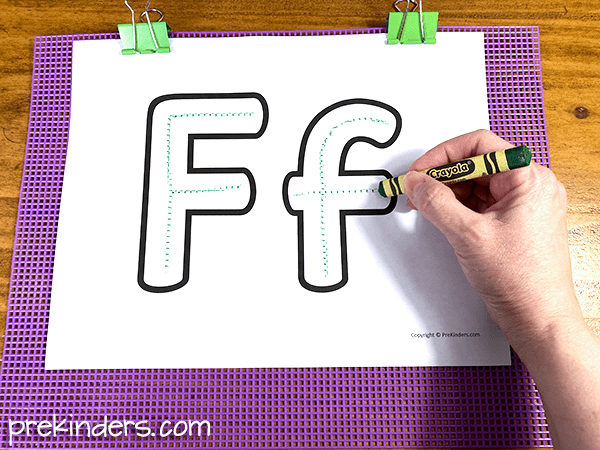
Here’s a variation of the same activity, using larger letters. Children trace the inside of the letters with their finger. I used the alphabet printable letters on this page.
For a neat tactile writing experience, place a sheet of paper on top of a piece of plastic canvas and clip the paper with binder clips. Have children trace the letter with a crayon. You can use a fun color of plastic canvas for this!
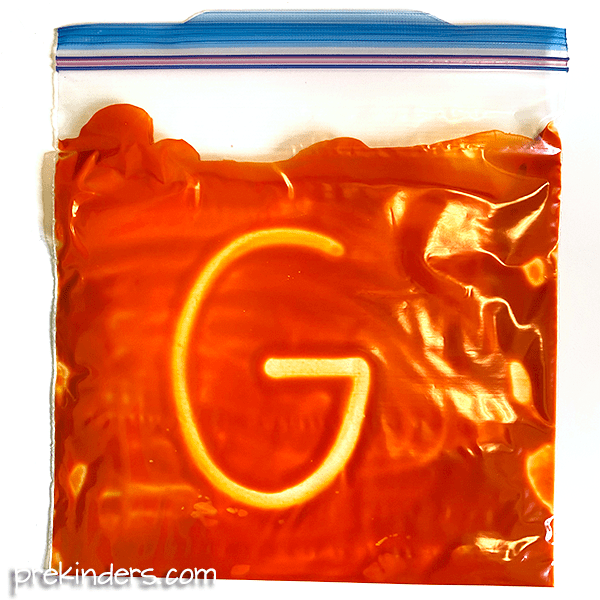
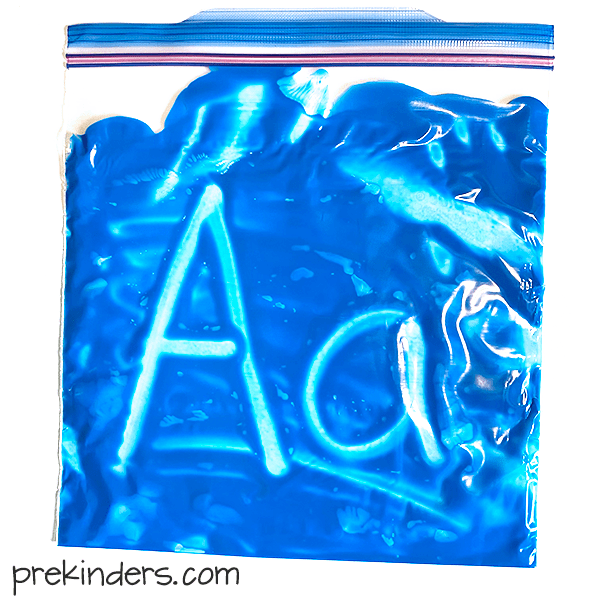
Paint Bag Letters
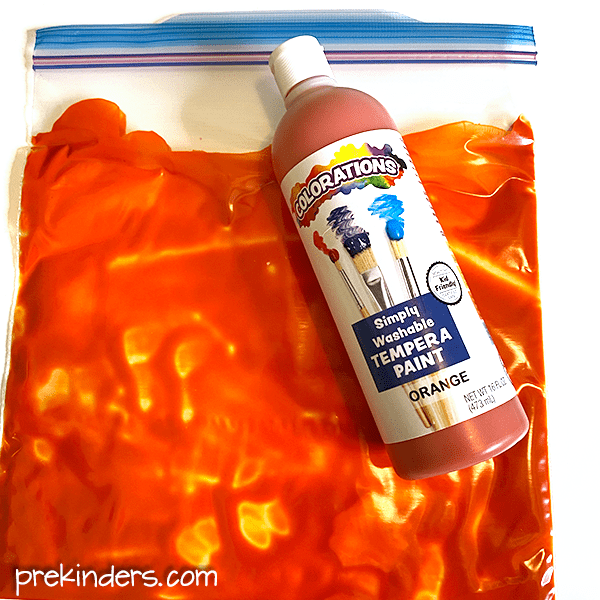
To make the paint bags, just squirt a little tempera paint in a gallon size freezer ziplock bag. You really don’t need a lot of paint. I recommend the freezer bags because they’re more durable.
Smooth all of the air out of the bag, zip it, and spread the paint around the bag. Also, be sure to seal the top of the bag with duct tape. (The duct tape is not shown in my picture, but it’s a good idea to use it so the paint won’t leak out.)
Children can write letters on the paint bag with their finger or a Q-tip.
Find more Writing ideas for Pre-K here