
Today’s post was written by guest writer, Rheney Williams.
Mini-Monograms: Simple Stained Glass Window Creations for Learning Letters
When you’re just starting out in life, you have to learn everything from scratch. It seems like an obvious statement but what may not be so apparent is the difficulty some kids have with taking in all sorts of new knowledge at a rapid pace.
Fortunately, there are ways to help them along their educational paths and lighten the loads of their learning journeys!
As any teacher can tell you, the learning process is exponentially easier when kids don’t realize they’re actually learning! In other words, if they’re just having fun, kids can learn all sorts of things by doing without attaching the mental stress that so often comes with trying to learn something new or unfamiliar.
And because learning letters is the first step to spelling, reading and writing, why not make a game out of it? We already have a song to make learning the alphabet easier so let’s add another visual aid to the mix to help kids familiarize themselves with the look and feel of letters.
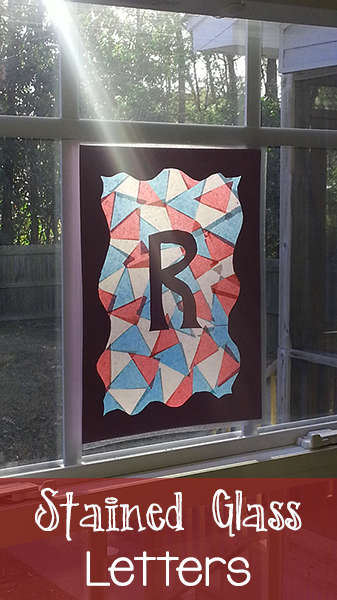
Here’s a stained glass window art project that incorporates your children’s monograms. It’s an awesomely simple craft that actively engages kids in learning the alphabet and learning how to spell their names without ever alerting them to the fact that it’s educational!
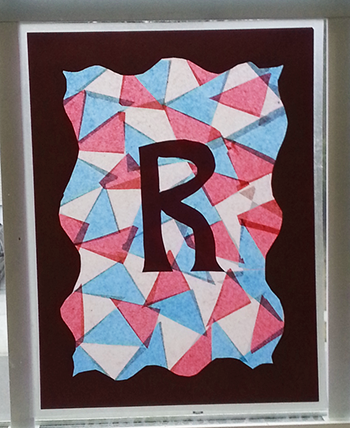
‘Smart’ Windows
Even though it’s still cold outside, these brightly colored monograms will help kill the chill and warm up your windows in no time!
And speaking of colors, since the spring holidays (Valentine’s Day, St. Patrick’s Day and Easter being the big three) are right around the corner, one idea is to let the kids pick colors that coordinate with those specific festivities. That way, they can even present their creation to mom or dad as a double-duty handcrafted keepsake and holiday memento in one!
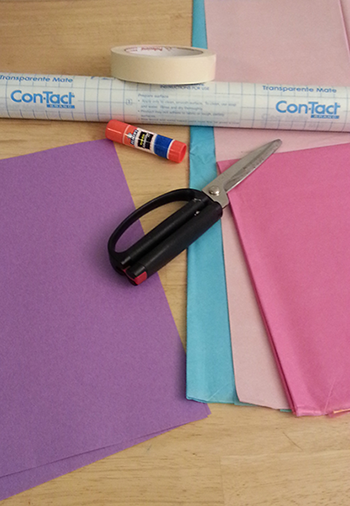
You’ll need:
- Clear Contact Paper
- Masking Tape
- Construction Paper
- Tissue Paper
- Scissors
- Glue Stick
- Tape for Hanging the Monograms
As a quick side note on my technique: There are many different ways to make these stained glass projects but I find the least messy and most durable to be this method (as opposed to a wax paper and glue setup, for example) because there is virtually no clean up involved and you have a ‘laminated’ project that will hold up without putting it through the time consuming (and expensive) laminating process.
Select 2 pieces of construction paper in the same color and cut out the center to create a border. If you place the sheets on top of each other and cut them out at the same time, you can ensure they will match up later.
Save the center portion that you cut out from the construction paper and use this for cutting out your monogram letter.
Cut out two portions of the contact paper that are slightly larger than the construction paper borders. Pull back the corner of one of the sheets of contact paper and once you have enough exposed, tape down the top edges to your work station so that the sticky side faces up.
Center the construction paper border on top of the piece of contact paper.
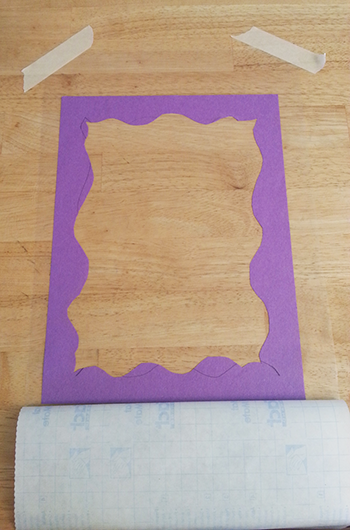
*Tip: Notice how I’ve left the bottom part of the contact paper cover rolled over but not removed– this is so you don’t accidentally attach yourself to the sticky paper!
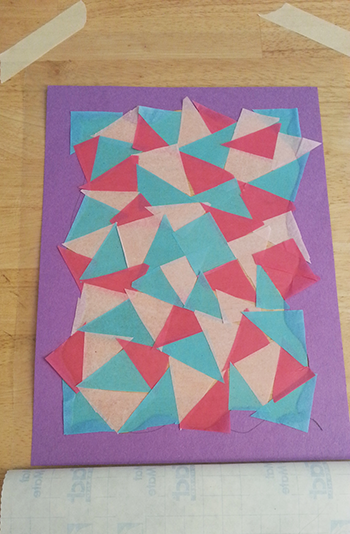
From here, cut a few strips of the tissue paper. I used 3 strips of tissue running the entire length of the sheet and roughly about 1 ½” wide, 1 each of blue, pale pink and fuchsia.
Although you can cut out whatever shapes you wish, I chose to cut triangles by stacking all three strips of tissue paper and alternating straight and angled cuts on the edges.
Begin filling in the interior of the border in a pre-determined design or randomly. I started with the corners to give it a loose ‘structure.’

I continued filling in with the triangles, doing my best to alternate the colors so that no two of the same were directly touching each other.
Also, don’t worry if pieces overlap or extend beyond the border because your top construction paper border will conceal any extensions.
After you have completely filled in the border, lay the top piece of construction paper directly on top, lining it up with the border below, and place the monogram letter in the center.
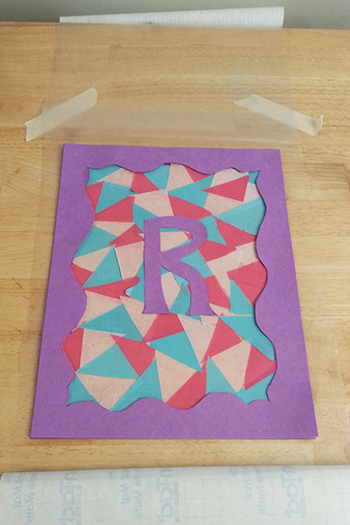
Once you are satisfied with the placement, wipe the glue stick on the back of the monogram letter and around each of the corners before pressing them gently in place.
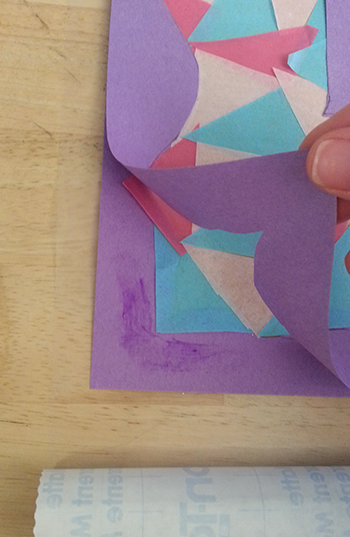
The last step is to peel back the cover sheet from the remaining cut of contact paper and smooth it over the top of the stained glass window. Rub over the surface with a ruler to remove any bubbles.
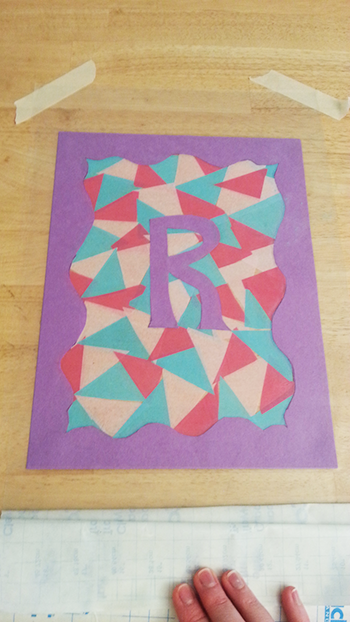
Carefully remove the now ‘laminated’ sheet from the work surface and trim around the edges, leaving about ¼” on each side.
And now the monograms are ready for their window debuts!
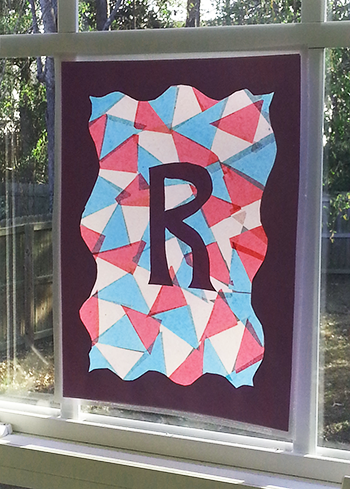
Check out the awesome effect created with the backlighting coming in from the other side of the window!
In addition to letters, what other teaching tool designs can you include on a project like this?
Rheney Williams enjoys sharing her DIY crafting experiences with others. Rheney writes about her doors and windows projects for The Home Depot. Her craft décor interests often center on projects that parents can create with their kids.